The 500th Squadron Attacks Vunapope

The following excerpt comes from Warpath Across the Pacific. At this point in the story, the 345th Bomb Group is attacking Vunapope, located near Rabaul, on October 18, 1943.


“While the other squadrons were attacking the airfield, the six planes of the 500th swept wide and raced across the tree tops of a vast coconut plantation towards the supply dumps and docks along the bay just west of the airfield. Ahead, the pilots saw three freighters anchored close along the shore, and the flights lined up on the two largest, strafing their way across the shoreside supply dumps as they advanced. The flight led by 1/Lt. Max H. Mortensen aimed for a 5000-ton freighter on the right, while Capt. Anacker led his two wingmen towards the 6187-ton cargo-passenger ship Johore Maru on the left.

Mortensen released a single 1000-pound bomb which hit the water twenty yards short of the freighter, while Lt. Raymond Geer’s two bombs went long. The huge geysers thrown up seconds later by the exploding bombs completely obscured the ship. The airmen reported that they thought the bombs had rolled it over, but Japanese records do not support the claim that the ship was destroyed.

Mortensen’s flught pressed on over the bay and lined up on Subchaser #23 out in the channel. 1/Lt. Thane C. Hecox dropped his two 1000 pounders a few yards directly in front of the ship. The four-second delay fuses provided just enough time for the warship to run directly over the bombs before they exploded, ripping off the bow.

Meanwhile, Anacker’s flight was already in trouble. 1/Lt. Ralph G. Wallace’s TONDELAYO had lost its right engine to ground fire as it lined up on the target. From the top turret, S/Sgt. John Murphy could see a piston moving up and down through a jagged hole in a cylinder and the cowling. Wallace quickly feathered the prop and continued his bomb run. As the three planes approached the ship, the air was filled with machine-gun bullets and cannon shells as both the attackers and the defenders lashed out viciously. All three planes launched bombs as they neared the ship, one of which bounced off the deck and hit the water. Seconds later the target was surrounded by huge waterspouts as the bombs exploded, drenching the ship in spray. Crew interrogations indicated the bombs lifted the ship out of the water and debris was seen flying through the air; the ship was claimed as badly damaged and probably sunk. Again the claim was optimistic; Japanese records show that the Johore Maru was sunk by a submarine five days later.

Attacking Japanese Freighters
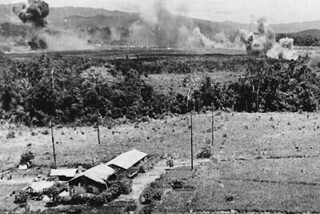
This photo shows the 500th Squadron’s attack on shipping at Vunapope, near Rabaul, which led to the epic air battle in which 17 Japanese fighters were claimed shot down for the loss of two B-25s. Taken from plane #572, piloted by 1/Lt. Thane C. Hecox, this photo shows attacks on a 5000-ton and 6000-ton freighter. Both vessels were claimed sunk, although the photographs and Japanese shipping records do not confirm this. (John C. Hanna Collection)

Thirty minutes before the strafers hit Rapopo, a Jap spotter station on the east coast of New Britain had radioed a warning to the defenses. Pilots rushed to aircraft on alert status at the ends of the runways and took off in droves from the various airfields around Rabaul.

By the time the attack began, over a hundred Japanese Zeros from the 201st, 204th and 253rd Kokutais were echeloned above 5000 feet over St. George’s Channel and Blanche Bay. Before the Japanese pilots took on the strafers, they expected to have to deal with a larger fighter escort and formations of high-flying B-24s.

While the six squadrons of B-25s savaged the two airfields, the fighters continued to circle, unwilling to lose the advantage of their altitude. But when no fighter escort materialized and the 498th and 500th Squadrons reached the Channel, the Japanese Navy pilots reluctantly dropped the black noses of their Mitsubishi fighters and dove steeply to intercept the retreating formations. Thus, both lead squadrons of B-25s were met by a cascade of Japanese “Zekes” falling on them from above.

The air battle was joined almost as soon as the 498th Squadron crossed beyond the end of the runway at Ropopo and flew out over the water off Lesson Point. As each squadron of B-25s came off the target, it immediately dropped down as low as possible over the water and its flights reformed into a tight vee formation, thus bringing the maximum defensive fire power to bear. For the next twenty-five minutes the “Zekes” repeatedly attempted to break through he hail of .50-caliber tracers which greeted them at each advance towards the formations. Again and again, the massed fires of the turret and waist gunners shot them down or drove them off before their cannons and machine guns could do serious damage to the B-25s.

The 498th gunners were credited with ten kills and one probable, the 501st with ten more and three probables, and the 499th with two kills and one more probable. The 499th encountered less opposition because most of the Jap fighters followed the lead squadrons as they left the target.”

Repost: Preparing for the Battle of the Coral Sea

As the anniversary of the Battle of the Coral Sea draws near, we decided it was time to revisit our 2017 post on the subject and how it impacted the 3rd Bomb Group.

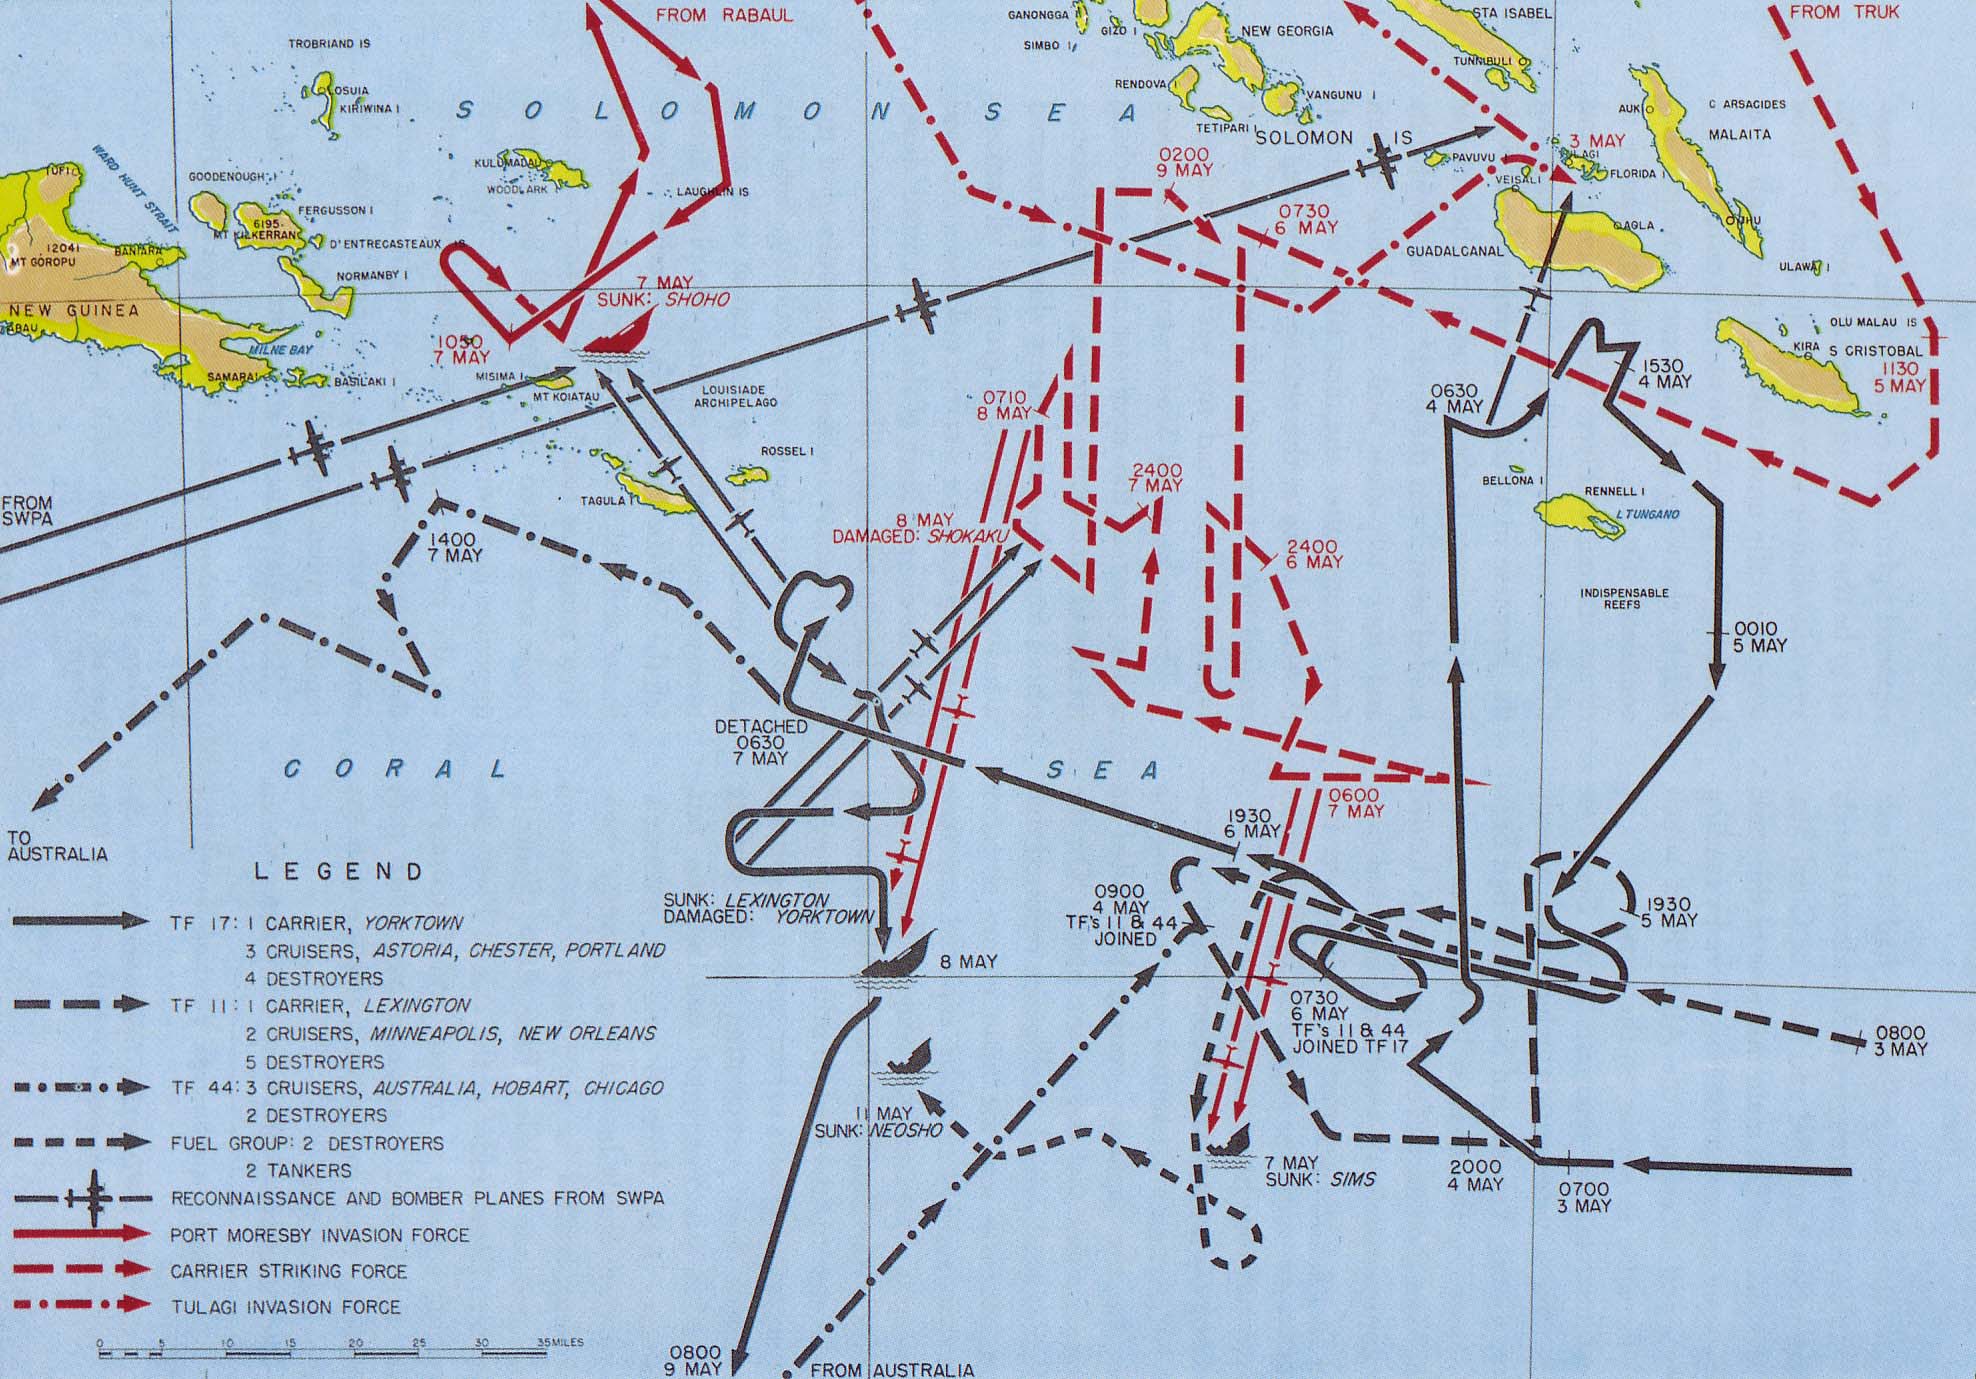
As of May 1942, the Japanese expansion of territory in the Pacific had nearly reached its peak. The biggest danger was in the south: the last significant Allied base on New Guinea, Port Moresby, was under continual air assault and vulnerable to a sea-borne invasion force. If the Japanese were to capture Port Moresby, they would be able to launch air raids on Australia itself, which would threaten invasion of a nation that was already reeling from a series of losses over the prior six months.

To that end, a large strike force composed of three aircraft carriers, more than a dozen escort warships, and transports carrying over 5000 soldiers were sent to the Coral Sea, where they were to sail west to Port Moresby. Fortunately, the Allies had intercepted signals conveying the attack, and positioned a task force of similar strength in the Coral Sea.

By May 3rd, both forces were in position, but neither had yet spotted the other. Scout planes were sent up, from the Japanese carriers, American carriers and also from Port Moresby. The crew of Lt. Roland “Dick” Birnn, from the 3rd Bomb Group, were flying a B-25 medium bomber on May 4th when they spotted the Japanese carrier Shoho near the island of Guadalcanal. Three Zero fighters took off from the deck of the carrier, but Birnn had immediately turned around and escaped before they could engage.

By this point, word had spread at Port Moresby about the imminent threat, and the air was tense. The administrative officers of the base were preparing to destroy everything valuable in the event of a successful landing. Eighth Bomb Squadron, of 3rd Bomb Group, was preparing to fight to the last man. Their C.O., Floyd Rogers, gave a mission briefing that was more like a pep talk, encouraging them to hit the Japanese with everything they had as soon as it was in range. The airmen started wearing their parachutes when on alert for a mission.

A map showing the movements of naval forces during the Battle of the Bismark Sea. (United States Army Center of Military History via Wikipedia)

On the 6th, with the Japanese maneuvering closer to New Guinea, scout ships were flying missions on a constant rotation. An RAAF Hudson spotted Japanese ships at 8:25 AM, the 19th Bomb Group’s B-17s flew an unsuccessful bombing run at 10:30, and at 12:10, Lt. Gus Heiss, of the 3rd, spotted the convoy again. He was sent directly to the head of the intelligence department to report his findings, and between them all, it was clear the two forces would be within striking distance that evening.

Interestingly enough, that’s actually where the story ends, at least for Port Moresby. The actual fighting was conducted almost exclusively by carrier aircraft over the 7th and 8th. The land-based groups held back their planes for when the Japanese were about to land, an event which never occurred. The Japanese forces were driven off in a costly engagement for both navies, but they were never able to engage New Guinea proper. In fact, most of the men at Port Moresby weren’t even given any information about the battle deciding their fates. They were stuck listening to broadcast radio or even reading the paper.

Repost: Black Sunday–Part 1

Tomorrow marks 78 years since Fifth Air Force crews were caught on the wrong side of a front as they tried to get home from attacking Hollandia. First published in 2010, the following story is a repost of the first in a four part series on the 312th Bomb Group’s experience on April 16, 1944.

The 312th was back to attacking Hollandia with bombers from the rest of Fifth Air Force: B-24s from the 22nd, 43rd and 90th Bomb Groups, B-25s from the 38th and 345th, and A-20s from the 312th, 3rd and 417th (a new bomber unit). These 216 planes with 76 P-38 escorts from the 8th and 475th Fighter Groups would be in the air once again on April 16, 1944. The only 312th Squadron not flying along was the 386th.

Bad weather at Hollandia delayed the Group from leaving Gusap until 1055. The crews bombed their targets of barges, stores and fuel dumps in between Sentani Lake and Jautefa Bay. After making their runs, the 312th formed up and headed for Gusap. With decent weather for the first half of the journey back, the men were able to grab a bite to eat while they flew home.

Hollandia
This photo from the Black Sunday raid shows the attacks going on behind the Japanese officer quarters.

As they flew on towards the Ramu Valley, conditions rapidly deteriorated. The planes were near Amaimon, 78 miles north of Gusap, when the weather completely closed in around them. Colonel Strauss was in the lead and had to decide what the best way back home would be. He rejected flying to Saidor because he did not know what the weather was like there or if Saidor would be able to handle the number of planes since this base was only a few weeks old.


Strauss and the rest of the formation circled for about an hour in hopes of spotting a break in the clouds. As they circled, visibility improved enough for the hilltops to be seen, and Strauss thought there might be fair skies on the other side. Sure enough, he was right. At 1715, the Group began landing at rainy Gusap. Not everyone stayed with Col. Strauss. There were still 16 312th aircraft somewhere out in the stormy weather. The 312th wasn’t the only group with missing crews. By the end of the day Fifth Air Force could not account for 70 planes.

By nightfall, 12 Roarin’ 20’s aircraft had landed at Faita, Saidor and Finschhafen, four at each base. There were still four crews missing: Capt. Frank P. Smart with gunner T/Sgt. Michael Music, Lt. Glen Benskin and S/Sgt. Winifred F. Westerman, 2/Lt. Joseph E. Gibbons and Cpl. Orville J. Rhodes, and 2/Lt. Charles H. Davidson and Sgt. John J. McKenna.

Smart had been granted permission from Col. Strauss to leave the formation and fly to Saidor. He left with four other planes piloted by 1/Lts. Donald J. McGibbon and Robert J. Findley, and 2/Lts. Robert C. Smith and James L. Knarr.

James Knarr Landing
Knarr landing his plane at Gusap in April 1944.

As they flew, the weather improved and Smart, Findley and Knarr decided to fly five miles offshore to avoid enemy ack-ack, while  McGibbon and Smith stayed near the coastline. At 1730, McGibbon heard Smart contacting a Catalina about ditching. As Smart descended, Smith noted that the propellers were working and thought Smart wanted to ditch while he could still control his plane. Smart and Music made it out of the plane safely, McGibbon and Findley radioed Smart’s position to Saidor and two PT boats that seemed to be on their way to the ditching site. Feeling confident that Smart and his gunner would soon be in good hands, the remaining crews flew off to Saidor. The next day, there was still no sign of Smart or Music. The four planes flew over the ditching site and saw the submerged plane, but neither crew member. Their fate is still a mystery.

To be continued in part two

You can also find this story in Rampage of the Roarin’ 20’s.

Skip-Bombing the Aoba

In early April 1943, the 43rd Bomb Group was repeatedly sent on missions to keep an eye on the Japanese base 150 miles northwest of Rabaul at Kavieng, New Ireland. On April 2nd, no shipping activity was observed, but Australian Coastwatchers reported seeing somewhere between 10 and 12 ships around the harbor area. Just in case the Japanese were planning a convoy mission, eight B-17s from the 64th Squadron were loaded up and sent out to disrupt those plans in the wee hours of April 3rd.

To keep Japanese from locating the B-17s easily, pilots flew with blacked out instrument panels. Their only source of light was provided by the stars. “In this way our night vision became very acute,” wrote pilot Arthur T. Curren. “In fact on long night missions we flew the B-17 by fixing reference stars in the corners of the windshields and flew by the seat of pants, not artificial horizons, etc. I can’t really explain to you or understand myself at this late date [50 years later] the visual cues and sightings I used to fly this mission.”

April 5th diagram
Note the date on this diagram. For this post, it is used as an example of the bombing runs made by B-17 pilots. After the 64th claimed hits on multiple warships near Kavieng on April 3rd, the 63rd was no doubt eager for their own chance on the target the next day. This diagram plots the bombing runs flown by the 63rd Squadron and the reported size and position of their targets. (Hoover Cott Collection)

Arriving over Kavieng and its harbor, each formation’s flight leader stayed near the base to drop an occasional bomb, another B-17 stayed high above the action to drop flares illuminating the anchorage and the rest of the B-17 crews hunted for ships to skip-bomb in the harbor. When the Japanese heard the planes, they sent up tracer rounds in attempt to locate them. Gunfire of all sorts flew around the harbor as the Japanese refused to turn on their searchlights and give away the positions of their ships. At one point, Curren noticed a flare burning beyond his right wing, likely on the deck of the heavy cruiser Aoba.

Lieuteanant Curren began his skip-bombing approach and was greeted by heavy antiaircraft fire. “Suddenly, I realized that we were headed directly into the side of a Japanese cruiser, just aft of the pagoda [the tall tripod structure amidships] and below the height of the bridge and forward structure.” He held his course and altitude until the bombardier confirmed that the last bomb had dropped, then “I jerked back on the controls and we cleared the ship. None of the crew, including co-pilot Roger Kettlleson, have any idea of how close we came to tripping over the steel superstructure. The navigator later reported he thought we would hit the water when his altimeter read 50 feet below sea level on the bomb run.”

B-17 night skip-bombing diagram
An illustration of the basic concept of skip-bombing. Note that unlike small and medium bombers, the four-engine B-17 could not pull away from the ship immediately after dropping its bombs. This is why the 43rd Bomb Group only skip-bombed at night: passing over an enemy ship at that altitude during the day would have been extremely dangerous. (Unknown Collection)

Curren’s tail gunner reported that three bombs exploded and the crew felt two shockwaves and witnessed bright explosions from the cruiser. After that run, it was time to head for home. While the flight back was uneventful, Curren’s landing nearly turned precarious when he realized that the landing gear had not lowered. He pulled up, flew around, then landed with the gear down. Later, it was reported that one of the bombs from Curren’s plane scored a direct hit on the Aoba and the other two explosions were actually from two of the ship’s torpedoes subsequently exploding. The Aoba was towed to Truk, where it underwent initial repairs for three months, then was moved to Kure, Japan for six months’ worth of more extensive repair work.

Using a B-17 for night skip-bombing missions was no easy task. This post summarizes the vivid description written by Lt. Curren and printed in Ken’s Men Against the Empire, Volume I. We highly recommend our readers pick up a copy of the book for his full story.

Art from the Archives

This illustration was originally commissioned from aviation artist Jack Fellows for a smaller book that would have focused specifically on the Battle of the Bismarck Sea. Unfortunately, we did not have the manpower to pursue this project, and the color section of Ken’s Men Against the Empire, Volume 1, where it would have fit thematically, did not have any spare room for a fourth painting.

Art from the Archives

The scene depicts the final day of the Battle of the Bismarck Sea on March 4th. By that time, only two crippled ships remained in the area after the remaining four destroyers had been withdrawn. Hundreds of Japanese soldiers and sailors from the sunken and disabled ships were in the water awaiting rescue and struggling for survival.

Fifth Air Force commanders believed that the Japanese soldiers in lifeboats, barges and rafts still represented a threat should they be brought to Lae and verbal orders were given to strafe any vessels containing Japanese servicemen. Many of the American and Australian airmen were reluctant to carry out these orders, though they had all heard stories of war crimes committed by the Japanese during the past 16 months of war. Still, these ordered attacks were carried out, albeit with a lack of enthusiasm.

The collective attitude of the 43rd Bomb Group B-17 crews was very different. One day earlier, the 63rd Squadron B-17 KA-PUHIO-WELA, piloted by 1/Lt. Woodrow W. Moore, was shot down by Japanese fighters. As members of Moore’s crew bailed out, they were fired upon in their parachutes by the Japanese Naval pilots.

The story of this atrocity spread like wildfire through the 43rd, then the rest of the Fifth Air Force combat crews. To the 43rd’s airmen, this order was an opportunity to take retribution for their friends in Moore’s crew. Thus the cycle of violence and death in war was perpetuated.

Here, 1/Lt. James C. Dieffenderfer, piloting the 63rd Bomb Squadron B-17 FIGHTIN’ SWEDE, sweeps low over the water, with wing dipped to allow the left waist and turret gunner a clear shot. In the foreground, a Daihatsu barge that had been rescuing survivors zips out of the line of fire. They would have been targeted next. In the background a Japanese ship is burning.

Pilot Spotlight: Edward L. Larner Makes History

On October 28, 1942, 89th Squadron CO Maj. Donald P. Hall made the following entry to his diary: “Capt. Ed Larner, a classmate of mine has just come over from the states. Ed and I used to fish a lot while we were at Barksdale Field [in Louisiana]. He and 12 other are joining my Squadron. We flew to Port Moresby today. Good to be back with the squadron.”

Captain Edward L. Larner, who was originally with the 46th Bomb Group, had been reassigned and sent to Maj. Hall’s 89th Squadron in the 3rd Bomb Group. He arrived as an experienced pilot with more than 800 flying hours under his belt. It wasn’t long before Larner made a name for himself as a fearless low level A-20 pilot and he came to the attention of Gen. George C. Kenney. “I found I had another fireball in the 3rd Attack Group, named Lieutenant Ed Larner,” Kenney wrote on November 10th. “That lad was good. He had fire, leadership and guts.”

90th Squadron C.O. Edward L Larner
Captain Edward L. Larner joined the 3rd Bomb Group in late October 1942. A classmate and friend of Maj. Hall, he was assigned to the 89th Squadron where he made a name for him- self as an aggressive combat pilot. Barrel-chested and willing to put up his fists, he always wore a beat-up service cap pushed back on his head. He would soon become one of 3rd Bomb Groups preeminent pilots and commanders. (Gordon K. McCoun Collection)

After the A-20 strafer project was deemed a success, Pappy Gunn and Jack Fox began working on similar strafer test modifications for the B-25 Mitchell. Some senior pilots were skeptical that a medium bomber could be utilized for low level strafing. However the North American bomber did have the range necessary to reach Japanese air bases. Kenney was in favor of Larner’s promotion to C.O. of the 90th Squadron. By the end of December 1942, Larner was at Port Moresby, training 90th Squadron pilots on these modified B-25s.

Around the time of all this armament development, word about the 43rd Bomb Group using B-17s to skip-bomb ships was getting around. Major William G. Benn had led the first successful skip-bombing attack on October 23, 1942 and was continuing to work on the technique up until his death on January 18, 1943. Pilots in the 89th Squadron began practicing skip-bombing in A-20s around the end of December 1942, followed by 90th Squadron pilots in their newly-modified B-25s a few weeks later. Even though pilots still had their doubts about using B-25s in that manner, they continued their practice throughout the month of February.

On March 3rd, Larner, who had since been promoted to Major, was leading the 90th Squadron into what would be known as the Battle of the Bismarck Sea. He put their practice to use and proved that the B-25 strafer would be an effective skip-bombing aircraft. Breaking away from his formation that day, he was followed by three of his lieutenants. “Damn it! Get the hell off my wing and get your own boat!” he yelled at them.

Nearby, Capt. John P. “Jock” Henebry watched Larner make his solo run. “I was leading the second element. Everybody was rather apprehensive. When everybody saw him make that pass and hit it with at least one and maybe two and the explosion and so, that just ignited the whole thing and the guys got the idea if he could do it, they could do it.” 

When Maj. Larner had taken over command of the 90th, the Squadron was reeling over the loss of senior pilot and former commander, Captain William “Red” Johnson, who had crashed on a transit flight near Townsville, Australia on New Year’s Eve. Larner’s transfer to the 90th and his confidence in the B-25 as a strafer bomber would re-energize the men in the Squadron. The combat crews were excited to watch their leader make that flawless first run on March 3rd.

Unfortunately, Maj. Larner would not remain the 90th Squadron’s leader for long. While he was a bold pilot, some of his flight maneuvers led him to be deemed reckless by some of his peers. His trademark approach would be the cause of his death on April 30, 1943. Coming in to land at Dobodura, he dove towards the airstrip and flew low over the field, then pulled up sharply into a chandelle. Usually, he performed this maneuver in a B-25 that was not full of fuel, eight passengers, baggage, tools and 2000 pounds of bombs. When Larner pulled up, the plane stalled, went into a flat spin, then crashed and exploded on the ground. There were no survivors. He left behind a wife and two daughters. Captain Jock Henebry would go on to lead the 90th Squadron.

Profile History: Gypsy Rose

This aircraft was assigned to the 19th Bomb Group and was flying with the 435th Reconnaissance Squadron by the second week of July 1942. Transferred to the 403rd Bomb Squadron, 43rd Bomb Group on November 9, 1943, its first two flights with the 403rd were courier missions piloted by 1/Lt. Robert B. Irwin. It is unknown to what extent this aircraft was flown in combat by the 403rd. The bomber was transferred to the 65th Squadron in mid-January, after the 403rd relinquished their B-17s at the time of their move to Mareeba, Australia.


The bomber was flown regularly on combat missions by the 65th, including the follow-up raid the day after the big attack against Rabaul on February 14th, the largest raid the 43rd had conducted against the Japanese bastion up to that time. The B-17 received two holes in its vertical stabilizer. This aircraft also participated in the Battle of the Bismarck Sea when it was flown by Arthur A. Fletcher, Jr., who was a regular pilot of the aircraft. On March 2nd, Fletcher missed his target entirely, but on the afternoon of the 3rd, he watched his bombs score a near miss on the destroyer Asashio, which he claimed was responsible for immobilizing the ship.

The last combat mission for the bomber was a night raid against Rabaul on May 24, 1943. The plane was running low on fuel during the return flight, forcing the pilot, 1/Lt. Raymond S. Dau, to ditch it in the sea off Buna. No one was hurt in the water landing and everyone made it into the life rafts, from where they were picked up by a boat from the 41st Infantry Division the next day.

B-17 Gypsy Rose
B-17E #41-9193, GYPSY ROSE, was initially transferred to the 403rd Squadron as a transport plane after serving in the 19th Bomb Group but before it went to the 65th. While in the 65th Squadron, it acquired its nickname and nose art, a reference to Gypsy Rose Lee, a contemporary striptease performer. GYPSY ROSE was lost on May 24, 1943, when it ran out of fuel returning from Rabaul and was ditched near Buna. All of the crewmembers survived unhurt. (Charles Stenglein Collection)


The name of this aircraft, GYPSY ROSE, is a reference to Gypsy Rose Lee, a famous burlesque dancer, actor and author of the era. The nose art depicts her performing her famous striptease act. The name, written in red and outlined in orange, is reminiscent of brightly lit neon signs outside of theaters and clubs. The cursive script used in the lettering of the name is of the style seen on many early 65th Squadron aircraft, indicating #193 acquired its nickname while in the 65th. Also partially visible in our profile painting are the block letters U.S. ARMY painted on the underside of the wings. This identifier had been removed from the USAAF markings specifications before the 43rd began flying combat, but the bomber came out of the factory paint shop so marked, and this was never painted over.

The known combat missions this aircraft flew, all in 1943, were: Rabaul, 2/15 (Fletcher); Rabaul, 2/23 (Crawford); Battle of the Bismarck Sea, 3/3 (Fletcher); Rabaul, 3/23; and Rabaul, 5/24 (Dau).

Read more about the 43rd Bomb Group and see the color profile for this B-17 in Ken’s Men Against the Empire, Volume I.

Pappy Gunn and the A-20 Strafer

“Build a fire under anybody that can do us any good in getting the planes put together and sent up here…If you can catch any A-20’s coming up from the South marking time in Brisbane kick them [the pilots] in the pants for me and tell them we need those A-20’s. Do anything you think best to get planes assembled and tanks and guns installed…Every plane we have is today out on a mission. More planes — more missions…Sure glad that you are down there to get that job done.” —Col. John Davies to Capt. Pappy Gunn

It was with some resignation in May 1942 that the 89th Squadron C.O., 1/Lt. Donald P. Hall, surveyed the reassembled Douglas A-20A bombers and came to grips with the reality that these were the same ones they trained on in the U.S. and had been flown in four maneuvers. Their attack bombers were old. At least one of them had come from the Douglas factory in late 1939. They were all worn with plenty of mileage and some were beyond their peacetime service life of 273 days.

Unfortunately, factory-new aircraft would not be forthcoming over the next year of war, as all new production of the speedy light bomber were destined for the fight against Germany in the fronts of North Africa, Europe and as lend-lease for the Soviet Union. 3rd Bomb Group crews would have to “make do” with their old A-20As, a practice that many of the men were familiar with, having grown up during the Great Depression.

Their bombers lacked the range necessary to reach the combat front and their frontal armament of four .30-caliber machine guns lacked the firepower needed to cause enough damage and destruction. The planes would receive a series of modifications to turn them into fearsome attack bombers. These improvements and the tactics developed in 1942 and 1943 would go on to impact the air war strategy of the entire theater.

First up was the limited range of the aircraft. Depending on the bomb load, the A-20 had a combat radius of 260-337 miles, not far enough for a flight from Port Moresby to the Japanese bases of Lae and Salamaua on the other side of the Owen Stanley Mountains. That modification was straightforward: each A-20 was eventually outfitted with two 450-gallon fuel tanks in one of the two bomb bays.

B-25 Pappys Folly
Paul I. “Pappy” Gunn in the cockpit of one of his early B-25 strafers “Pappy’s Folly” in early 1943. (G. John Robinson Collection)

The other modification was to the A-20’s light defenses up front, which consisted of four .30-caliber machine guns along the bottom of the nose. Captain Paul I. “Pappy” Gunn was convinced that a heavier armament could be installed inside the nose section of the bombardier’s compartment. The person who allowed him to realize this vision was an Army Air Force pilot and engineer who Gunn had known from his pre-war days in the Philippines, Capt. Frederick G. Hoffman. Their paths crossed again in Australia on April 28, 1942 when Hoffman was overseeing the assembly of aircraft in Brisbane and Gunn was down there to begin work on a strafer prototype. They discussed the project and Gunn was introduced to engineer 1/Lt. Tom R. Tompkins, who would facilitate the installation. First, Capt. Bob Strickland and Pappy Gunn had to go see Army Air Force Commander Lt. Gen. George H. Brett to receive the go-ahead for the project.

After an OK from Gen. Brett, a prototype was put together. It made a successful first test, leading to Pappy Gunn declaring that he wanted to see all of the 3rd’s A-20s modified with the four nose guns. Once the planes were assembled, serviced and flight-tested at Eagle Farm, they were flown to Amberley for fuel tank and strafer modifications. There was an ample supply of .50-caliber machine guns that had been salvaged from dozens of P-39 Airacobra and P-40 Warhawk fighters that had crashed by new pilots learning to fly the powerful Allison-engine pursuit planes during training and ferry flights from January through April 1942.

A-20 strafer installation
This is a frontal view of the Douglas A-20A-1 with four .50-caliber machine guns installed inside the bombardier’s compartment. The metal tubing is part of the hydraulic system for charging the guns. Officers of the 3rd Bomb Group, engineers at Amberley Field as well as enlisted men of different service units around Brisbane contributed ideas and helped design and fabricate this successful weapon system. The five men who were most responsible were Capt. Pappy Gunn, Capt. Donald P. Hall, Capt. Fred G. Hoffman, 1/Lt. Tom R. Tompkins and T/Sgt. Victor J. Mitchell. Prior to the installation of the forward-firing heavy machine guns, the A-20A’s forward armament consisted of four .30-caliber guns, two on each side of the fuselage. (William J. Beck Collection)

Pappy Gunn took Col. Davies’ urging to get the planes done and ready for combat as quickly as possible. This required the acquisition of myriad aircraft parts and supplies. He was rumored to have drawn a gun on one supply officer which got him banned from the Brisbane area for several months. Just a few months later the successful strafer modification was adapted to the B-25 Mitchell by Pappy Gunn and Jack Fox, the senior “tech rep” of North American Aviation.

In early 1943, the pilots of the 89th and 90th Squadron began to develop their own low-level bombing technique, similar to skip-bombing that had been successfully established by Maj. William G. Benn with the B-17 crews of the 43rd Bomb Group in 1942. (For that story, read Ken’s Men Against the Empire, Volume I.) This technique combined with the strafer modification turned the A-20s and B-25s of the Pacific Theater into low-level powerhouses that helped drive the Japanese out of New Guinea and the Philippines.

Any records and photographs documenting this modification process were never created, did not survive the past 80 years or possibly remain undiscovered. The story is told here for the first time using the personal diaries, memoirs, correspondence and interviews with the 3rd Bomb Group pilots and officers who were there.

For the full story of the A-20 strafer modification, read Chapter 9 of Harvest of the Grim Reapers, Volume I.

The new book has arrived!

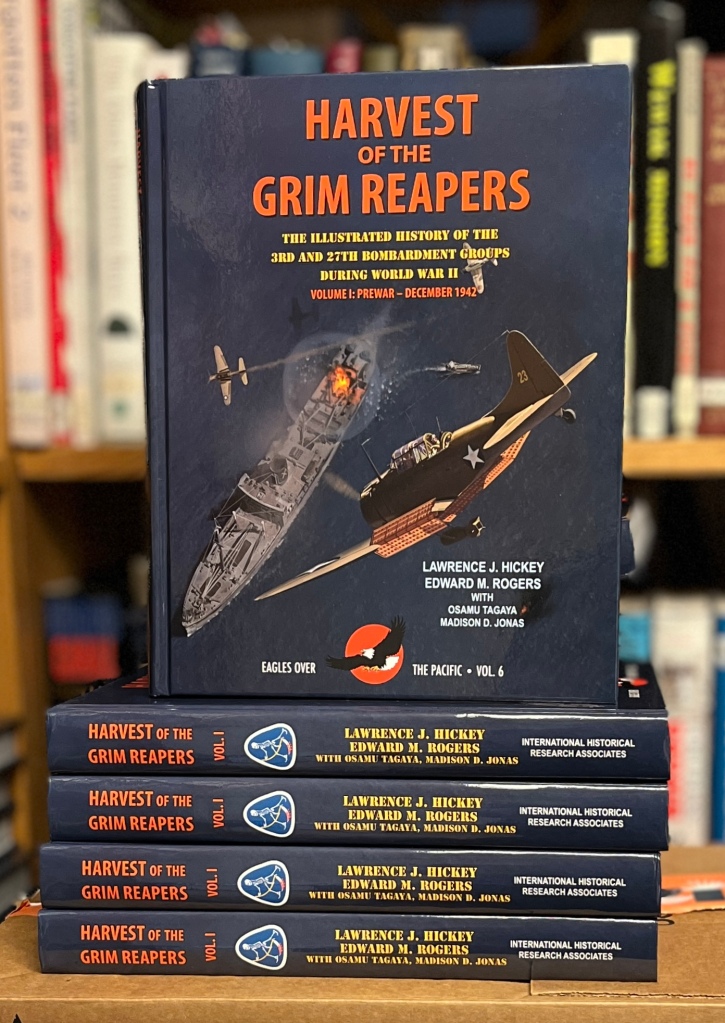
We are excited to announce the release of Harvest of the Grim Reapers, Volume I. The books arrived earlier this week and we are now working on shipping out all of the preorders. If you haven’t ordered your copy yet, now is a great time to do it! We hope you enjoy the latest installment in the Eagles Over the Pacific series.

Now shipping: Harvest of the Grim Reapers, Volume I.